|
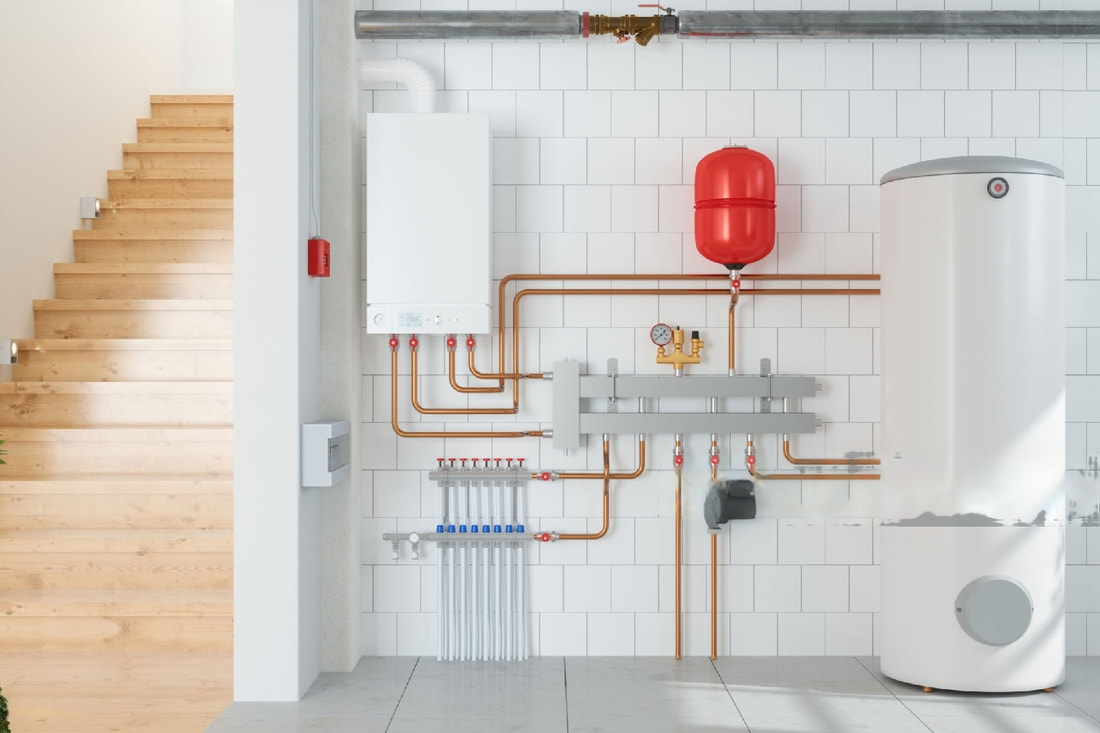
Your water heater is crafted to consistently heat water to a uniform temperature, eliminating the need for frequent adjustments. Nevertheless, there may be instances where you notice your water is either not sufficiently warm or excessively hot. Should this occur, here's a comprehensive guide on adjusting the temperature for various water heater models, along with recommendations on the ideal hot water temperature. What Temperature Should a Water Heater Be Set At?Most water heaters are engineered to function safely within the temperature range of 120 to 160 degrees Fahrenheit. Many tank-style units offer a low-temperature option, heating water to approximately 90 to 100 degrees Fahrenheit, which aids in energy conservation. However, it's imperative not to leave the unit at this setting when hot water is in use. Maintaining a minimum temperature of 120 degrees Fahrenheit within the tank is crucial to prevent the rapid growth of harmful bacteria, notably Legionella, responsible for Legionnaire’s disease, which thrives in warm water. Setting the water heater to at least 120 degrees ensures the water is sufficiently hot to eliminate bacteria. Although most units can be set as high as 160 degrees Fahrenheit, it's advisable not to exceed 140 degrees Fahrenheit to mitigate the risk of scalding. The EPA recommends a default setting of 120 degrees Fahrenheit to conserve energy and prevent scalding. Conversely, OSHA suggests setting the water heater to 140 degrees Fahrenheit for enhanced cleaning and sanitation purposes. Temperature settings between 120 and 140 degrees Fahrenheit are considered safe, allowing for personal preference. If there are young children in the household, setting the water heater to 120 degrees Fahrenheit is prudent to prevent scalding accidents. For households without young children or with older children, adjusting the temperature to 130 or 140 degrees Fahrenheit is typically recommended. Additionally, increasing the water heater temperature during winter months is advisable as colder water lines can cause a significant drop in hot water temperature during transit. Failing to adjust the water heater for winter conditions may result in insufficiently warm water at faucets and showers.  How to Adjust the Temperature on a Gas Water HeaterIf you own a tank-style gas water heater, you'll find the temperature control knob positioned near the base of the unit. Adjusting the temperature on such a unit is a quick task, simply requiring you to turn the knob to increase or decrease the setting. However, the challenge lies in the fact that these units typically use numbers and symbols instead of indicating actual temperatures. Therefore, understanding the temperature corresponding to each setting is essential to avoid inadvertently setting the temperature too high or too low. Fortunately, these symbols are generally standardized across most units. The first setting beyond "Off" is typically labeled as "Low" or indicated by a solid circle, representing a temperature range between 90 and 100 degrees Fahrenheit. The subsequent setting, usually labeled as "Hot" or marked with a triangle, should correspond to 120 degrees Fahrenheit. Following that, you'll usually encounter three higher settings, denoted as 1, 2, and 3, or A, B, and C, corresponding to temperatures of 130, 140, and 150 degrees Fahrenheit, respectively. The highest setting, labeled as "Very Hot," corresponds to 160 degrees Fahrenheit. For older water heaters, there may also be a "Pilot" setting used for relighting the pilot light, although newer units typically utilize electronic igniters instead. Additionally, some units may feature a "Vacation" setting, which prevents energy wastage by keeping the unit off while you're away, although gas flow to the pilot light may still be maintained to keep it lit. How to Adjust the Temperature on an Electric Water HeaterModifying the temperature on a tank-style electric water heater follows a similar process to that of gas units. However, electric models typically conceal the temperature control behind an access panel situated near the unit's bottom. To access the control, you'll usually have to unscrew the panel cover and remove any insulation in the way. Subsequently, simply adjust the control knob to the desired temperature or corresponding symbol. After adjustment, remember to reinstall the insulation to prevent heat loss and energy inefficiency. How to Adjust the Temperature on a Tankless Water HeaterAdjusting the temperature on a tankless water heater is simpler compared to other types of units. This is facilitated by the presence of a digital display on most tankless models, indicating the current temperature setting. To raise or lower the water temperature, simply use the up or down arrows on the display until your desired temperature is shown. How to Measure Your Water TemperatureAll water heaters may encounter occasional issues leading to fluctuations in temperature, either higher or lower than normal. If you notice sudden changes in the temperature of your water, we advise measuring it to assess the heater's functionality.
To measure your hot water temperature accurately, begin by turning on the hot water faucet at a sink to its maximum setting. Allow the water to run for at least 30 seconds to ensure it reaches its peak temperature. Then, utilize a kitchen thermometer to gauge the temperature. If it differs from the set temperature on your water heater, it's prudent to have the unit inspected to identify the underlying cause of overheating or insufficient heating. At Meade’s Heating and Air, we offer comprehensive assistance for any water heater issues you encounter. Our services encompass repair and maintenance for all water heater models, including installation of both tankless and conventional units. Additionally, our team of certified technicians specializes in ductwork, indoor air quality services, and various heating and cooling solutions. If you require water heater or HVAC services in the Sterling area, don't hesitate to contact us today.
0 Comments
When your air conditioning (AC) system fails, it can be a major inconvenience, especially during the scorching summer months. However, with the right knowledge and tools, you can often repair your AC at home without the need for expensive professional assistance. In this comprehensive guide, we'll walk you through the steps to troubleshoot and fix common AC issues, saving you time and money. Assessing the ProblemThe capacitor is a critical component of your AC system that helps start the compressor and fan motors. If the capacitor fails, your AC may not turn on or may struggle to start. To repair this issue, you'll need to test the capacitor using a multimeter. Start by turning off the power to the AC unit and discharging the capacitor to prevent electrical shocks. Then, carefully remove the capacitor and test it for continuity. If the capacitor fails the test, you'll need to replace it with a new one. Cleaning the AC UnitOver time, dust, dirt, and debris can accumulate inside your AC unit, hindering its performance. To repair your AC, start by turning off the power to the unit at the circuit breaker. Then, carefully remove the exterior panels to access the interior components. Use a vacuum cleaner with a soft brush attachment to gently remove any dirt or debris from the coils, fan blades, and other components. Be sure to also clean the condensate drain line to prevent clogs. Checking for Refrigerant LeaksLow refrigerant levels can cause your AC to blow warm air or fail to cool properly. To repair this issue, you'll need to check for refrigerant leaks and, if necessary, recharge the system. Start by inspecting the refrigerant lines for any signs of damage or corrosion. If you notice any leaks, you'll need to repair them using a refrigerant leak repair kit or call a professional HVAC technician for assistance. Testing the CapacitorThe capacitor is a critical component of your AC system that helps start the compressor and fan motors. If the capacitor fails, your AC may not turn on or may struggle to start. To repair this issue, you'll need to test the capacitor using a multimeter. Start by turning off the power to the AC unit and discharging the capacitor to prevent electrical shocks. Then, carefully remove the capacitor and test it for continuity. If the capacitor fails the test, you'll need to replace it with a new one. Lubricating Moving PartsProper lubrication is essential for ensuring smooth operation of the fan motors and other moving parts in your AC system. Over time, these parts can become dry and worn, leading to increased friction and potential damage. To repair this issue, apply lubricating oil to the bearings and other moving components as recommended by the manufacturer. Be sure to use the correct type and amount of lubricant to avoid causing damage to the system. ConclusionWith the tips and techniques outlined in this guide, you can repair your AC at home and restore comfort to your living space. By following these steps carefully and methodically, you can often resolve common AC issues without the need for professional assistance. However, if you're unsure or uncomfortable performing any of these repairs yourself, don't hesitate to contact a qualified HVAC technician for help.
Is your air conditioner failing to keep your house cool despite running continuously? It can be frustrating to deal with a malfunctioning AC unit, especially during hot summer days. Before you start sweating over the thought of expensive repairs or replacements, try these top 10 tips to troubleshoot and potentially fix your AC woes. 1. Check the ThermostatOften, the culprit behind an AC not cooling adequately is a simple oversight with the thermostat. Ensure that it's set to the correct temperature and switched to the cooling mode. Sometimes, a dead battery or faulty wiring can also cause thermostat issues. 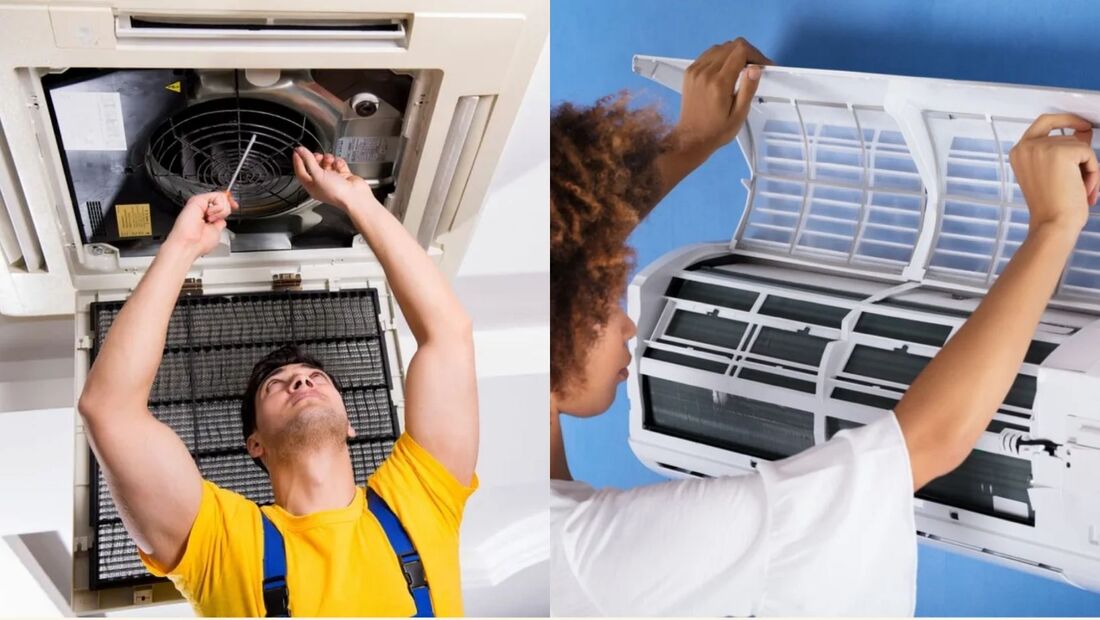 Adjust the Temperature SettingsEnsure the thermostat is set to a temperature lower than the current room temperature to activate cooling. 2. Clean or Replace Air FiltersClogged or dirty air filters can restrict airflow, making it harder for your AC to cool effectively. Check your filters regularly and clean or replace them as needed, typically every 1-3 months. Cleaning the FiltersUse a vacuum cleaner or gently wash the filters with mild soap and water. Allow them to dry completely before reinstalling. 3. Inspect the Condenser CoilsDirty or obstructed condenser coils can hinder heat transfer, reducing the efficiency of your AC system. Inspect the outdoor unit and clean the coils if they appear dusty or covered in debris. Cleaning the Condenser CoilsUse a coil cleaner or a mixture of water and mild detergent to gently scrub away dirt and grime. Rinse thoroughly and let dry before turning the unit back on. 4. Ensure Proper AirflowCheck for obstructions around both the indoor and outdoor units that may impede airflow. Trim back any foliage or clear away debris such as leaves or branches. Removing ObstructionsKeep at least two feet of clearance around the outdoor unit to ensure adequate airflow. 5. Check for Refrigerant LeaksLow refrigerant levels can prevent your AC from cooling efficiently. Look for signs of refrigerant leaks, such as hissing noises, ice buildup on the refrigerant lines, or decreased cooling performance. Detecting Refrigerant LeaksConsult a professional HVAC technician to locate and repair any refrigerant leaks safely. 6. Examine the CapacitorA faulty capacitor can cause the compressor or fan motor to malfunction, leading to poor cooling performance. Have a technician test the capacitor and replace it if necessary. Testing the CapacitorUsing a multimeter, check the capacitance and resistance of the capacitor to determine if it's functioning properly. 7. Inspect the Evaporator CoilsOver time, evaporator coils can accumulate dirt and debris, reducing their ability to absorb heat from the air. Inspect the coils and clean them if necessary to improve cooling efficiency. Cleaning the Evaporator CoilsA malfunctioning compressor can significantly impact the cooling capacity of your AC system. Have a professional technician test the compressor and replace it if needed. 8. Test the CompressorA malfunctioning compressor can significantly impact the cooling capacity of your AC system. Have a professional technician test the compressor and replace it if needed. Checking Compressor FunctionalityMeasure the compressor's voltage and current draw to ensure it's operating within the manufacturer's specifications. 9. Consider Professional HelpResearch reputable HVAC companies in your area and schedule a service appointment for a thorough inspection and repair. Hiring a ProfessionalResearch reputable HVAC companies in your area and schedule a service appointment for a thorough inspection and repair. 10. ConclusionDon't let a malfunctioning AC system leave you sweating this summer. By following these top 10 tips, you can troubleshoot and potentially fix common issues causing your AC not to cool properly. Remember to perform regular maintenance to keep your AC running smoothly and efficiently. Frequently asked questions (FAQ)1. How often should I replace my air filters?Air filters should typically be replaced every 1-3 months, depending on factors such as usage and indoor air quality. 2. What should I do if I detect a refrigerant leak?If you suspect a refrigerant leak, it's essential to contact a professional HVAC technician to safely locate and repair the leak. 3. Can I clean the evaporator coils myself?While it's possible to clean the evaporator coils yourself, it's essential to take proper precautions and avoid damaging the coils. Consider hiring a professional for this task if you're unsure. 4. How can I improve airflow around my outdoor AC unit?Ensure that there's at least two feet of clearance around the outdoor unit and remove any obstructions such as foliage or debris. 5. What should I do if my AC compressor is faulty?If your AC compressor is malfunctioning, it's best to contact a professional HVAC technician to diagnose the issue and recommend the necessary repairs or replacements.
Troubleshooting Guide: AC Not Cooling in Your HomeIs your air conditioner failing to keep your house cool? Don't sweat it! We've got you covered with some expert troubleshooting tips to get your AC back up and running efficiently. Identifying Common Issues with Your ACWhen your AC isn't cooling your home properly, several issues could be at play. Let's delve into some common culprits:
Steps to Resolve AC Cooling IssuesNow that you've identified potential issues with your AC, let's outline steps to resolve them effectively:
Regularly check and replace air filters every one to three months to ensure optimal airflow and cooling performance.
By following these troubleshooting tips and proactive maintenance strategies, you can resolve common AC cooling issues and enjoy a comfortably cool home all summer long. Remember, when in doubt, don't hesitate to seek professional assistance to ensure your AC system is operating at its best. Optimizing Your AC System for Maximum EfficiencyAchieving optimal cooling performance requires more than just troubleshooting and fixing issues. Here are additional steps to optimize your AC system:
ConclusionEnsuring your air conditioning system operates at peak efficiency involves a combination of proactive maintenance, troubleshooting, and optimization strategies. By following these tips, you can address common cooling issues, improve energy efficiency, and enjoy a comfortably cool home environment year-round. Remember to schedule regular maintenance checks and seek professional assistance when needed to keep your AC system running smoothly. With the right approach, you can beat the heat and stay cool and comfortable no matter the weather outside.
It might be challenging to find a reliable firm, and especially in the summer or winter, you could be tempted to go with the first one that can organize a fix. The last thing you want is to have to wait around for a shoddy repair company to fix your air conditioner or heating system when it breaks down. Nonetheless, it's crucial that you pick a reliable company that can provide the services you require rather than attempting to promote pointless products and services. Choosing a trustworthy HVAC repair company is easy if those considerations are made when doing your research. These methods will help owners who require specialized residential facilities. When selecting a trustworthy HVAC supplier, there are a few considerations.  Six Trustworthy Tips on How to Choose Your HVAC ContractorWith any luck, these pointers will enable you to identify the ideal solution for your requirements. We would be grateful for the opportunity to win your business. Tip 1: Find out how long the HVAC company has been in businessIn usa, new companies open their doors on a daily basis. While many new businesses have the potential to succeed, less than half of them will still be operating five years after they are founded, according to StartUp Canada. Therefore, you should, at the very least, confirm that any contractor you work with has a minimum of five years of reliable experience working in your community. Hiring a contractor for a task doesn't mean you have to wait around for them to become unavailable to correct issues or maintain the equipment they installed for you. Tip 2: Read customer reviews and press about the HVAC companyNowadays, it's quite simple to find out what previous and present clients think about the services they obtained from almost any firm thanks to the internet. It is not necessary for you to depend just on the references or approvals that you find on a contractor's website. You can check if there are any significant issues or complaints with the company "AC Repair Annandale" by doing an online search. You can also check whether corporate representatives are responding to and resolving comments and complaints submitted on their social media pages (Facebook, Twitter, etc.) by visiting these pages. You can increase your confidence in the firm you choose to work with by independently researching a company's press and customer reviews. Tip 3: Make sure all HVAC technicians are trained, licensed, and insuredMake sure the HVAC contractor constantly requires all of its technicians to have insurance, a license, and training. In order to be sure you have options in the event that the service is subpar, you should also search for customer service guarantees. Avoid any organization that requests payment before providing services, does not have a business address or phone number, or declines to provide references from previous customers. Tip 4: Look for a satisfaction guarantee on all work performedIt is not worth your time or money to work with any HVAC firm that does not offer a satisfaction guarantee. The business you select ought to have an openly displayed policy outlining the process for resolving complaints and other difficulties. As an illustration, AC Repair Annandale has a Customer Trust Guarantee that is prominently displayed:
Tip 5: Compare quotes to make sure the quote you get is fairYou may always utilize price quotations to help you decide between two companies when you're choosing an HVAC contractor and everything else looks to be comparable. Make sure that the firm providing any price estimates you are comparing has truly taken the time to visit your location and provide you with the most precise, comprehensive quote; generic over-the-phone prices are not relevant in this case because things can alter once the technician gets to your location. You can compare pricing quotations from several companies here and select the one that provides the best value for your service requirements. Tip 6: Check out the company with the Better Business BureauThe BBB, often known as the Better Business Bureau, is the industry standard for Canadian companies who take pride in providing exceptional customer service. A company might choose to register with the Better Business Bureau (BBB), but getting accredited by the BBB is not a simple procedure.
It is therefore worthwhile to take the time and give careful thought to any HVAC contractor who has willingly undergone accreditation AND has maintained a rating of "A" or better. NOTE: AC Repair Annandale and our sister company, Clean Air Solutions, each maintains an “A+” rating with the Better Business Bureau. A heat pump that isn't cooling your house is the kind of issue you should take care of as soon as possible to keep your family safe and comfortable as summer temperatures rise. We're going to look at some of the most typical issues that could be causing your heat pump to break down. Before we get into the reasons your heat pump isn't working, remember that while some repairs may be completed by hand, others require the assistance of a qualified heat pump repair specialist. If you do decide you need the assistance of a qualified HVAC contractor, get in touch with the customer concierge staff at cozyheatingandcooling.com, and they can put you in touch with a respectable HVAC specialist in your region. Think about whether your malfunctioning unit could be the result of one of these most typical heat pump issues. 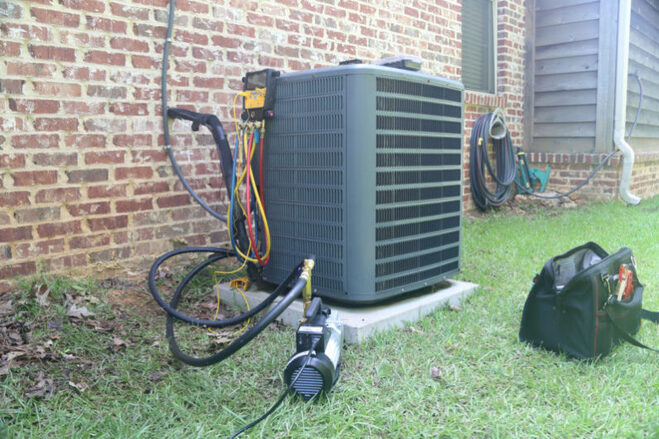 Common Heat Pump Problems and SolutionsHeat pumps are perfect for managing our variable hot and cool seasons since they offer a wonderful balance of energy economy and dependability. Having said that, they differ slightly from other, more typical forced air furnaces or air conditioning systems. When trying to troubleshoot issues, it's common for a homeowner to run into dead ends. You've come to the right place if you're seeking for more information about typical heat pump issues and how to resolve them; the licensed HVAC specialists at Cozy Heating and Cooling are here to assist. Heat Pump is Running All the TimeThe brief, irregular cycles of an electric central air conditioning system or gas furnace are probably familiar to you. Heat pumps, on the other hand, actually run extremely slowly and steadily; in harsh conditions, they may run continuously or for extended periods of time. You might need to contact for assistance, though, if your heat pump is running nonstop and spitting, chugging, or failing to provide the level of warmth you require in your house. If not, let the device operate. Heat Pump Has Ice and Frost on the Outdoor UnitBecause of the refrigeration cycle, heat pumps usually produce a tiny quantity of ice on the outside unit. The purpose of the defrost mode on heat pumps is to periodically clear the system of extra ice. But! In certain situations, your system may freeze over completely or develop an ice coat. Sometimes this is merely a glitch, and you can clear the ice by turning off the system and allowing it to thaw, or by using a constant stream of water. Never use a blunt or sharp instrument to remove ice! Each bent fin detracts little from the system's efficiency because the fins surrounding your outside unit are rather brittle. You should arrange heat pump repair if your system freezes up repeatedly, or even twice in a single season. This shouldn't be occurring, and it most likely denotes a refrigerant or airflow issue. Heat Pump is Leaking Water at the Indoor UnitYour heat pump should manage condensate and draining indoors in the same manner as other HVAC systems; runoff water should be collected and directed outside using a drain pan and drain line. You should have the heat pump serviced if there is a leak. Most likely, you have a condensate drain pan crack, a blocked drain line, or another drainage issue. Heat Pump Won’t Switch From Heat to CoolA part of heat pumps is known as a reversing valve. By doing this, the heat pump is switched from drawing air from the outside of your house to drawing air inside (or, to put it another way, from cool mode to heat mode). An older heat pump's valve often jams easily or breaks completely, which is one of the more frequent issues. In these situations, a professional will need to replace the valve, which means you'll need heat pump repair. Before contacting for emergency heat pump repair, always double-check that all of the settings on your thermostat are accurate. The frequency of simple user error is more than you might imagine! 4 Common Heat Pump Problems and What You Should DoHeat Pump Won’t Turn OnLack of power is frequently the cause of an inoperable heat pump. To begin with, make sure your system is in heat mode and set to a temperature higher than the ambient temperature in your home by checking the settings on your thermostat. Next, examine your electrical panel to see if your circuit breaker has tripped. Recent thermostat purchases may not be compatible with your heat pump or may have been connected incorrectly, which can lead to the destruction of delicate heat pump and thermostat components and thermostat failure. Should your heat pump have been installed by you or a general handyman, you may need to contact a qualified HVAC service specialist. Heat Pump Blows Cold Air In Heat ModeMake sure your heat pump is in heating mode rather than cooling mode if it is spewing cold air. If it's chilly outside, it can also be in defrost mode. If the latter, your system should resume regular operation when the defrost procedure, which takes about ten to fifteen minutes, is finished. If the chilly air is still being blasted by your system, consider looking for a filthy air filter. Anything that restricts airflow may have an effect on how well your heat pump works. The most frequent offender is usually a dirty air filter, but there could be other culprits like debris suffocating the outside unit or unclean coils that require expert cleaning. It is advised to give your local heater repair agency a call to further diagnose the issue if none of these fixes work. Heat Pump Is Struggling To Warm Your HomeMany of the same issues that lead to a system blowing cold air while in heat mode can also cause this condition. These issues include unclean coils, debris like grass or weeds obstructing circulation around the external unit, and dirty home air filters. Physical obstructions within your house, such as furniture obstructing registers and vents, may possibly be the source of the problem. Airflow and system performance are all lowered by these problems. Strange SmellsOdd smells typically spell trouble for your system and require professional attention. Worrisome odors include:
It's not necessary to be an expert in air conditioners to identify problems. Understanding the most typical issues that AC units face is quite helpful in averting malfunctions. Who wants to spend a steamy summer in Denver indoors without air conditioning? Be mindful of these ten typical problems: Why Is My Air Conditioner Not Cooling the House?Make Sure the Furnace Isn't the IssueReduce the temperature and put your thermostat in the AC mode. If the fan in the furnace turns on, there isn't an issue with the furnace. To ensure that the fan operates, attempt to reset the furnace's circuit breaker. The solutions outlined here won't work, so contact an expert if the fan still won't start. Next, examine the external condensing unit. The fan and compressor ought to be operating; the compressor makes a refrigerator-like noise. If not, carry out the troubleshooting and repairs as outlined below. 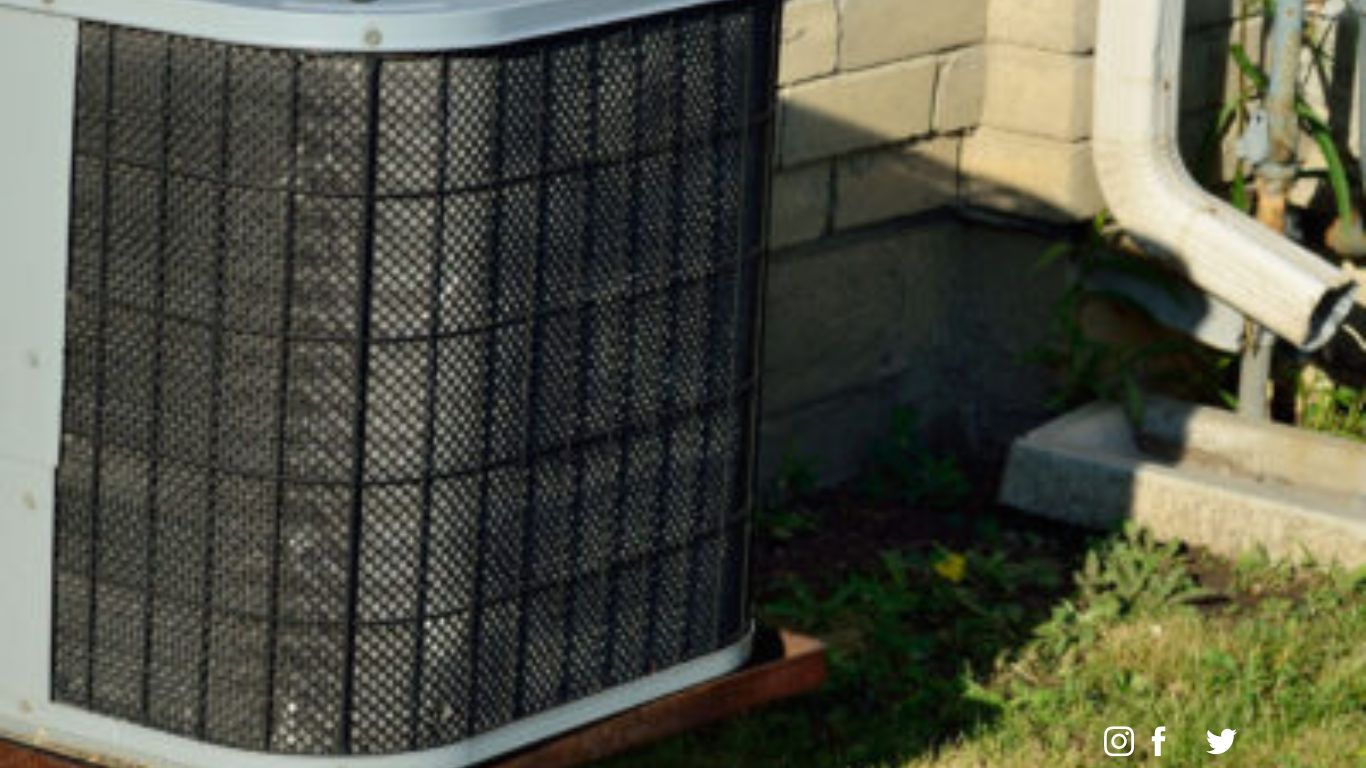 Turn off the power, please.Pull the outdoor disconnect or remove the access panel from the condensing unit after turning off the furnace and A/C breakers in the main electrical panel. Subsequently, ensure that the power is indeed off by using a voltage tester on the cables entering the contactor. Does Your AC Not Work? Purchase PartsThe most common and affordable components to fail are the start/run capacitor(s) and AC contactor (relay) (see image below). Therefore, it is important to purchase and install those parts as soon as possible, particularly if your air conditioning repair unit is more than five years old. You should wait to acquire a condenser fan motor replacement until you are certain that it is the cause of the failure, as they can cost up to $150. Locate the nameplate on the condensing unit (not your furnace) to purchase replacement parts. Record the model, make, and serial number (or snap a picture). Purchase the parts online, at a furnace dealer, or at an appliance store. Discover How a Central Home Air Conditioner WorksThe two main parts of a central air conditioning service system are the evaporator coil, also known as an A-coil, which is located in the plenum of your furnace or air handler, and the condenser, which is located outside your home. Heat from your house is transferred to the outside condensing unit by the refrigerant in the A-coil. To remove heat, outside air is blown through the condensing coil by the condensing unit fan. The condensing unit contains the three parts—the condenser fan motor, the start/run capacitor(s), and the AC contactor—that an amateur handyman may repair. The compressor is likewise housed in the condensing unit, however it can only be replaced by an expert. There are no DIY-friendly elements on the A-coil. Shut Off the Power
Condenser coil cleaningAn air conditioner condenser can be cleaned quite easily, and doing so is one of the routine maintenance procedures that will increase the unit's lifespan.
Test the FusesTwo cartridge fuses are found in many disconnect blocks. Before you start fixing them, check them. A blown fuse indicates a malfunctioning component within the condensing unit. Thus, avoid simply replacing it and declaring the issue resolved. Instead, put in new fuses, reinstall the parts, and turn the unit on. You have more significant problems; call a professional if it blows again. How the Disconnect Block Fuses Can Be Checked
Examine the Access Panel's InteriorLocate the access panel by following the electrical conduit that comes from the home. Turn off the electricity and take out the access-panel retaining screws before removing the panel. Look for mouse nests or signs that the wiring and electrical connectors have been chewed on before replacing any parts. Discharge the capacitor first if you discover damaged wiring or chewed insulation and you are capable of handling electrical repairs safely. After that, tidy the nest and fix the wiring. Or else give a pro a call. What you should know about air conditioner wiring is provided below. How a Dual Start/Run Capacitor Is Discharged
Change the capacitor(s) for the start/run.At least one capacitor is present in every air conditioning servicing unit. To offer both motors an extra boost of power during compressor and condenser fan startup, the capacitor stores and releases electricity. Additionally, it evens out voltage swings to prevent damage to the compressor and condenser fan motor. Over time, capacitors may gradually deteriorate and lose some of their starting power. Or they could collapse at any time. Long-term unrecognized gradual capacitor failure can put stress on the compressor and condenser fan motor windings, causing them to fail sooner than expected. Because capacitors are inexpensive, it makes sense to change yours proactively around every five years. How a Capacitor Is Replaced
Change the AC ContactorAn AC contactor is a $25 mechanical relay that switches 220-volt high-amperage current to the compressor and condenser fan using low-voltage electricity from the thermostat. The most frequent causes of air conditioning service failures are worn-out AC contactors. It is wise to replace your AC contactor about every five years, even if it is still functional. To remove the cables, unscrew the original AC contactor. Once at the new unit, relocate the wiring.
How to Evaluate Your Fixes
A few things to consider when choosing whether to replace or repair an AC unit are its age, performance, and efficiency, and the cost of any necessary repairs. Ac replacement can help you prepare a less-stressed backup plan in case your system malfunctions on the hottest day of the year. A few additional years of operation can often be obtained from an older machine with minor repairs and routine maintenance. Signs Your Air Conditioning Isn’t WorkingThere are numerous indicators that your air conditioner isn't functioning properly, even if they might not be immediately apparent. Here are a few typical indicators that your air conditioner isn't functioning properly. It would be ideal to speak with your local air conditioning installer if you have any of these problems in order to determine the cause of the issue.
Should You Repair or Replace Your AC Unit?An expensive purchase, a new, high-quality, energy-efficient air conditioner. Therefore, it usually makes more sense to repair your current device unless it is malfunctioning and you are unable to fix it without incurring large costs. When determining whether to replace or repair your current air conditioning unit, some things to think about are as follows: 1. Age of the AC unitAn air conditioner typically lasts between ten and fifteen years. Your unit can function well for an even longer period of time if it receives regular maintenance and servicing. As a general rule, buying a new unit might be a better option if your current one is more than ten years old, the warranty has expired, you're having more issues, or the quotations you've received for repairs seem excessive. It could be preferable to fix your air conditioner if it is less than ten years old, has not had a significant breakdown, and has had regular maintenance. 2. The Repair's CostIt almost never makes financial sense to replace a relatively new AC unit until the cost of repairs reaches thousands of dollars. Many HVAC professionals use the "5,000 rule" as a starting point. Here, the age of the unit is multiplied by the cost of maintenance; if the result is more than $5,000, it could be wiser to replace the unit. Fix it if it's less. 3. Continual Maintenance of Air ConditionersIt goes without saying that yearly AC maintenance can reduce your air conditioning expenses. An AC unit tune-up typically costs between $60 and $550. Also, you may extend the life of your air conditioning system by cleaning out debris, replacing the filters on a regular basis, and sealing air leaks. 4. Environmental Effects and Availability of RefrigerantR-22 refrigerant is used in many air conditioners that are older than ten years. It is no longer permitted to produce this in the United States as of 2020. As a result, any leftover supplies are far more expensive than the easily accessible R-410A refrigerant found in contemporary systems. This will not only increase the cost and difficulty of refrigerant repairs, but the product may also add to the ozone layer's thinning in our environment. How Much Your Energy Bills Will CostAn older air conditioning machine will always be less efficient than a modern one, no matter how carefully you maintain it. Every air conditioner has a SEER rating, which indicates how energy-efficient it is. Nineteenth-century air conditioners had to have a minimum SEER rating of 10. This was changed to 13 in 2006 and subsequently to 14 in 2015. Most efficient, modern systems have a SEER rating of at least 20. Energy efficiency may also be impacted by an inadequately sized unit, an inadequate amount of refrigerant, or old electrical components. A new, more efficient unit is a wise long-term investment if you see that your energy bills are becoming more and more expensive. 6. How long do you intend to stay in your house?If you intend to move in the next several years, replacing your older unit might not be a wise investment, even if there hasn't been a catastrophic breakdown or the repairs are too expensive. However, be advised that a buyer may request a reduction in the sale price of your property to account for an outdated or poorly maintained air conditioning unit when it comes time to sell. The peace of mind that comes with a new unit and an extended warranty may be enough to convince you to consider replacing your air conditioning system even if you don't plan on selling anytime soon. 7. Incompatible Air Conditioning SystemTo properly heat and cool your house, indoor and outdoor air conditioning devices should function as a unit. For any unit to function well, its internal parts must be compatible with one another. Therefore, a mismatched system will not function as well and is more prone to malfunction. It's worth updating one or both units so they can function together if your mismatched system is the source of your ongoing problems. 8. Thinking About AestheticsIf you're renovating your house, you could have decided that an old, rusty-looking gadget is just too unsightly to keep around, even if it might work. There are various options to consider when choosing which type of air conditioner would look best with your recently improved décor. 9. Substitute MotivationAlthough it is an expenditure, changing your AC unit may be worthwhile due to a number of benefits. If you upgrade to a more modern and energy-efficient model, for instance, you may be eligible for a federal tax credit. Additionally, you should look into any state or local rebates that may be able to lower the total cost of replacing your old air conditioning equipment. 10. Comfort LevelYour comfort level is a crucial consideration when determining whether to replace or repair your current AC unit. Is the cool air you require from your existing unit coming on at a suitable time? Or is it taking an eternity to drop the temperature in your house by a few degrees? If your home has a too-tiny air conditioning unit, it may need to work twice as hard to keep up with the demands. Older units may also lose some of their cooling efficiency.
The last thing you want on a hot, muggy day is an air conditioner malfunction. It makes sense that when this occurs, your first thought would be to contact a professional air conditioning repair company. Usually, you can't fix major problems with your air conditioning machine alone. Fortunately, the more common AC issues are easily remedied with the correct troubleshooting techniques. Fixing these problems can help you save money. Let's look at the many kinds of AC units before getting into the list of recommendations. Although there are many varieties of air conditioning systems, split and packaged units are the most widely used varieties. Split units are divided into two sections. The evaporator coils are situated inside your home, but the condenser is located outside. Packaged units, on the other hand, get their name from the fact that the condenser and the evaporator are housed in one unit. Both types can be troubleshooted using the techniques described below. Now that you have that out of the way, let me share some simple and quick do-it-yourself advice for diagnosing and fixing small AC problems. 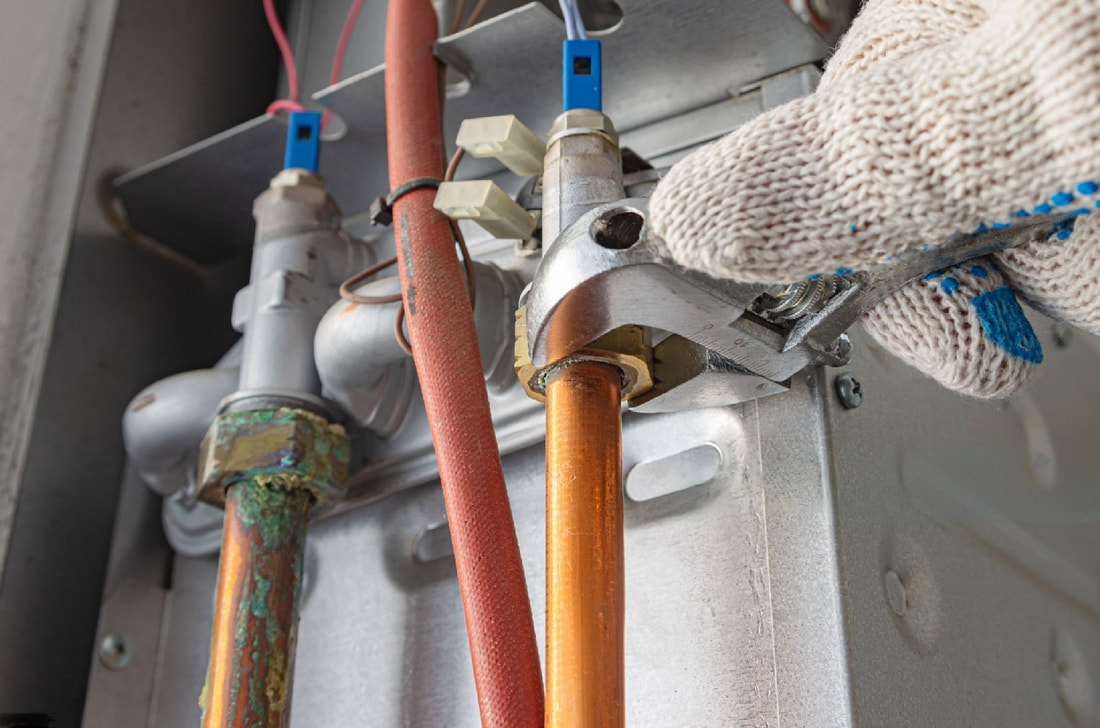 DIY Air Conditioner Repair TipsIf your air conditioner needs to be repaired, isn't operating at all, or is only blowing less than cool air, you can try the following fixes: Check Your BreakerIf the unit won't turn on at all, it's possible that your breaker tripped. Frequently, if multiple appliances, lights, and other items are connected to the same breaker, it will trip and the air conditioner won't work. You can avoid wasting money, becoming frustrated, or even feeling embarrassed by doing this brief check. Check The ThermostatWhen rushing or having a hectic day, it's easy to ignore this seemingly straightforward approach. Verify that the thermostat or AC remote is operating at a temperature lower than the surrounding space and that the batteries are functioning. Change Your FilterRegular filter changes help you avoid a lot of air conditioner troubles. A dirty or clogged filter can lead to some problems for your device. Insufficient airflow might lead to a decrease in the system's cooling effectiveness. Sometimes your system may ice up due to a clogged filter. It is important to regularly inspect and replace filters. Melt Any IceWhen your AC unit is too big for the room or during a colder period, ice can occasionally accumulate on it. All you have to do is let the fan run on its own or turn off the air conditioning for a short while, and the ice will automatically melt. Clean The Whole AC UnitYour air conditioner may only require a thorough cleaning rather than repair. Maintaining the optimal functioning of your unit is greatly aided by doing this. For split types, start by turning off the unit, cleaning the fan blades, and clearing the exterior unit of any debris. Remember to gently clean the condenser fins, taking care not to harm the fins or blades. Cleaning packaged units are much more difficult since they need to be taken out of the wall mount. Allowing a licenced air conditioning service expert to handle this is preferable. By taking out the front panel and sweeping the dust, you can perform some light cleaning. You might be able to resolve your frequent AC problems by following these procedures instead of having to contact a professional air conditioning repair service. However, don't be afraid to contact a reputable air conditioning repair firm if you lack the time to do it yourself or have attempted the troubleshooting and repair methods in this article and your AC still won't work. Give It A Good CleaningThe system may frequently merely be unclean. It might only require cleaning rather than an actual air conditioner repair. You can carefully clean the fan blades on the external unit and clear any debris that may have accumulated within or around it. Cleaning the condenser fins is another option. When playing with blades and fins, exercise extreme caution since they are brittle and easily bent. When cleaning the device, ensure sure it is off as well. Check Your Circuit BreakerYour circuit breaker may occasionally trip due to your air conditioner. Make sure your circuit breaker hasn't tripped by checking, and if it has, reset it. To help determine the problem, try turning on the AC. If it still trips the breaker, you should consult a technician. SummaryAlthough the aforementioned upkeep and repairs don't call for specialized training, it's vital to remember that doing repairs on your own could put your safety and the health of the AC unit at risk. An expert repair technician has the knowledge and resources necessary to identify and fix any problems with your air conditioning system. Additionally, they may offer preventative maintenance to keep your air conditioner operating at peak efficiency and extend its lifespan.
For the long-term health of your air conditioner, it is ultimately safer and more dependable to hire a professional expert for AC repair. Get in touch with Easy Breezy AC right now if you're in the Safety Har bour region and eager to collaborate with a reputable, industry-leading HVAC firm. As the most reputable AC installation, repair, and maintenance company in Florida, we currently serve about 4,000 residential and commercial clients. Are you sick and weary of having to wait a long time for hot water to boil? The moment has come to think about switching to an electric water heater! Installing one isn't as hard as it seems, you might be surprised to hear; just follow our instructions to make the procedure easier. Electric water heaters are dependable, efficient, and always prepared to provide hot water when needed. Think of them as your own personal hot water factories. We'll make sure you have an easy time installing an electric water heater by taking you step-by-step through the process in this guide. We'll also go over the reasons Essco water heaters are an excellent option for the water heating requirements of both residential and commercial areas. How to install an electric water heaterHow to install an electric water heater
 Step 1: Collect the Required Equipment and Suppliesassemble the necessary supplies and tools before starting the water heater installation process:
Step 2: Pick the Ideal SiteChoose a suitable spot for your electric water heater. It should have enough room for simple installation and maintenance, and it should be close to the electrical panel. Make sure the space is free of flammable objects and has adequate ventilation. Step 3: Cut the Water and Power OffWhen installing any electrical system, safety must come first. Cut the electricity to the existing water heater at the electrical panel. Likewise, turn off the water supply to the outdated water heater to avoid any leaks while it's being removed. Step4: Take Out the Antiquated Water HeaterRemove the old water heater's electrical wiring and water supply lines with caution. After releasing the fittings with the pipe wrench, take the old unit out of its place. Step 5: Installing the New Water HeaterMake sure the new electric water heater is positioned correctly in the designated area. Using a pipe wrench, attach the water supply lines and tighten the fittings. Look closely for any leaks of water. Keep in mind that only specialists should install the best water heaters. Step 6: Examine the Electrical LinkFor information on the precise electrical requirements for your Essco water heater, refer to the manufacturer's instructions. After stripping the wire ends with the wire stripper, attach them to the appropriate terminals on the water heater. Use wire connectors to firmly secure the connections. After finishing, switch on the electrical panel's power supply. 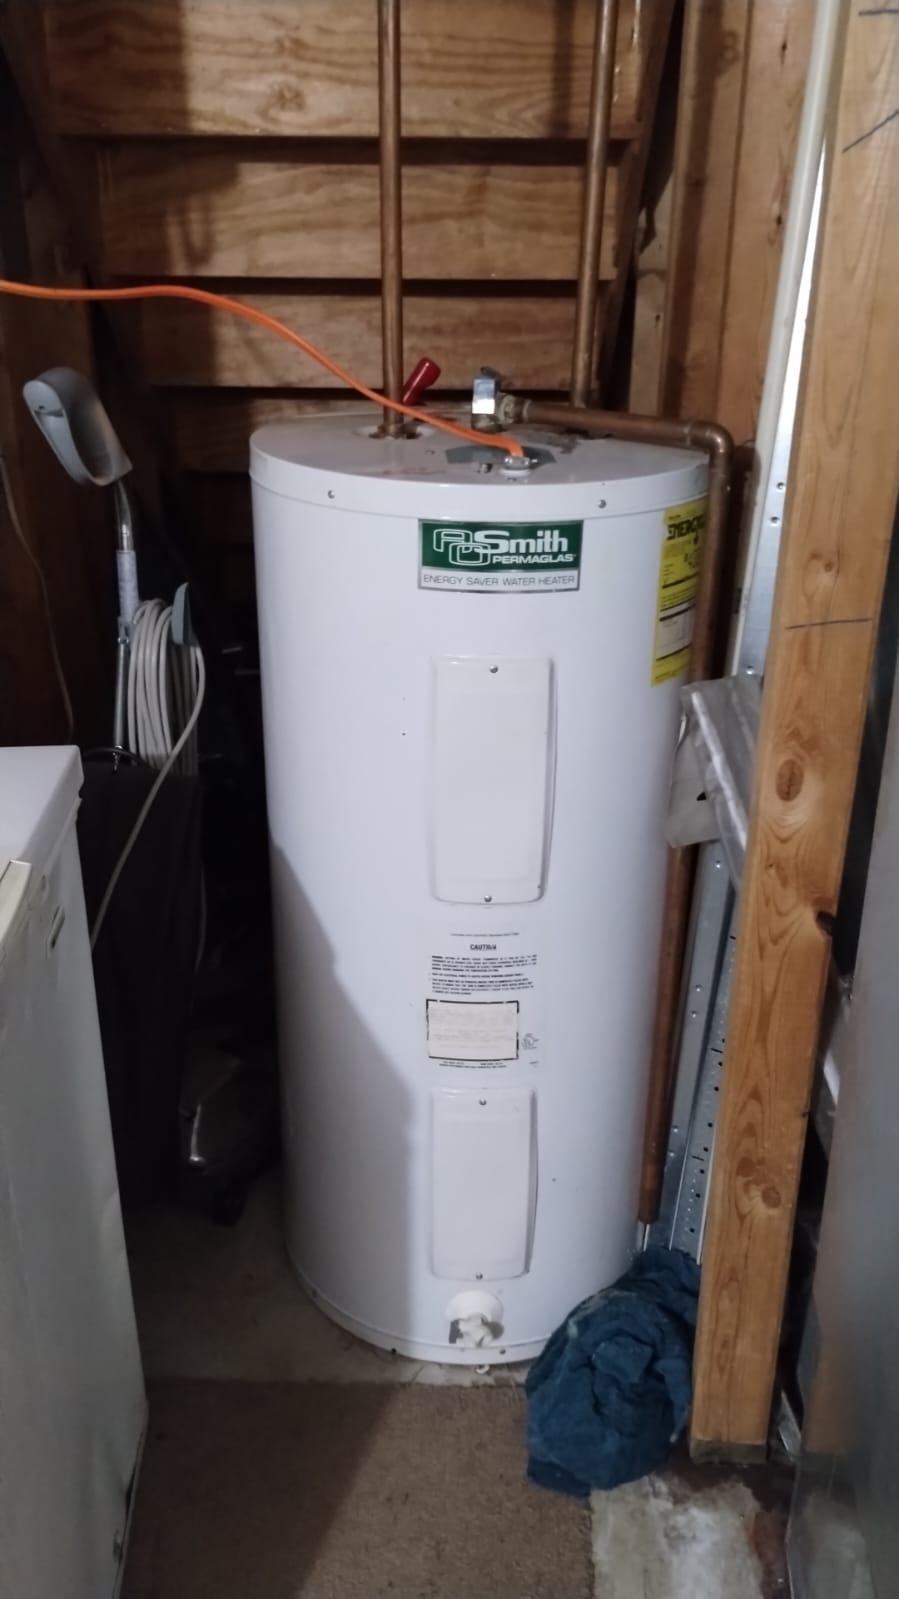 Step 7: Put water in the heater and test it.To allow the air to escape from the water heater tank, open a hot water tap in your house. The tank is full when the faucet produces a steady stream of water. Inspect for any water leaks and, if required, tighten connections. Step 8: Adjust the ClimateTo suit your tastes, change the water heater's temperature setting. For safety and energy economy, it is advised to set the temperature at about 120°F (49°C). Step 9: Upkeep AdviceRegular maintenance will keep your water heater operating efficiently and extend its lifespan. Drain the tank on a regular basis to check for wear or leaks, examine the pressure release valve, and get rid of any sediment accumulation. Considerations for Purchasing a Water Heater:
Essco Water Heaters: Why Pick Them?
In summary:In summary, you can install your water heater with confidence now that you have this simple to follow advice. However, it's okay if you're not comfortable handling electrical devices! At the service center operated by Essco by Jaquar Group, you can always count on expert assistance. They'll guarantee a secure and appropriate installation of your heater. Whether you want to do it yourself or seek professional help, the most important thing is to ensure your comfort and happiness.
|
AuthorWrite something about yourself. No need to be fancy, just an overview. Archives
March 2024
Categories
All
|

 RSS Feed
Local Service AreasAnnandale, VA
Fairfax, VA North Springfield, VA West Falls Church, VA Burke, VA Falls Church, VA Hours of Operation Monday - 9:00 AM - 6:00 PM Tuesday - 9:00 AM - 6:00 PM Wednesday - 9:00 AM - 6:00 PM Thursday - 9:00 AM - 6:00 PM Friday - 9:00 AM - 6:00 PM Saturday - 9:00 AM - 6:00 PM Sunday - Close |
Navigation |
ServicesAC Unit Replacement
AC Unit Repair Furnace Repair AC Maintenance Emergency AC Service Commercial Rooftop Unit Commercial AC Maintenance Apartment AC Repair Commercial HVAC Installation Water Heater Repair Air Quality Service Air Conditioning Repair Air Conditioning Maintenance Air Conditioning Installation Air Conditioning Replacement Air Conditioning Components Heating System Repair Heating Installation Heating System Maintenance Boiler Services Furnace Repair Heat Pump Repair |
Contact us
AC Repair Annandale
3906 Millcreek Dr. Annandale, VA 22003 (571) 999-7227 |